

How To Change From Wifi To Ethernet Windows 8
In Windows, when you connect to a wireless network, information technology will either register it equally a Public network or a Private network. Private networks are basically home and work whereas public networks are anywhere else, which you don't trust.
Sometimes Windows detects a individual network equally a public one and vice versa. You can manually make some changes to ensure that you are non accidentally sharing either too much on a public network or blocking all sharing on a private network.
In this article, I walk you through the steps for Windows x, Windows 8.1, Windows 8 and Windows 7.
Windows 10
In Windows 10, go alee and click on the Ethernet or wireless icon in the system tray of your taskbar. The Ethernet icon is like a footling computer and the wireless icon is, well, pretty well-known. In one case you do that, click on theNetwork & Internet Settings link.

This will bring you lot to the PC settings dialog with the Condition tab selected. If you lot are connected to a WiFi network, click on WiFi in the left-hand pane, otherwise click on Ethernet.
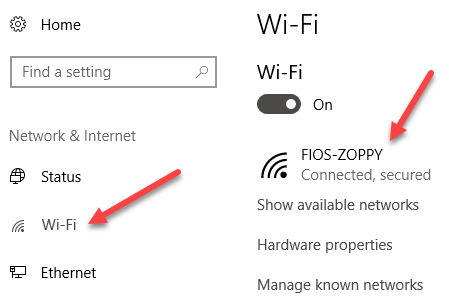

Go ahead and click on the name of the WiFi network or Ethernet network that has the Continued condition. When you click on the network, you will now be able to select Public or Individual.

For WiFi networks, you'll also take the option to connect automatically when in range of the WiFi network.
Windows 8.i
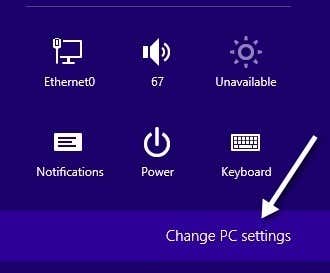
In Windows 8.1, to change the network profile, we have to go into the PC Settings screen. To do that, open up the Charms bar and click on Change PC Settings at the bottom.
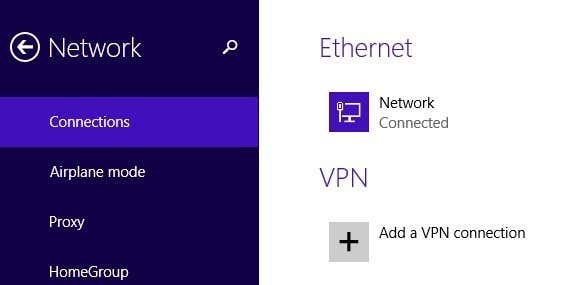
At present click on Network and you lot'll run into the list of connections, i.e Ethernet, Wireless, etc.
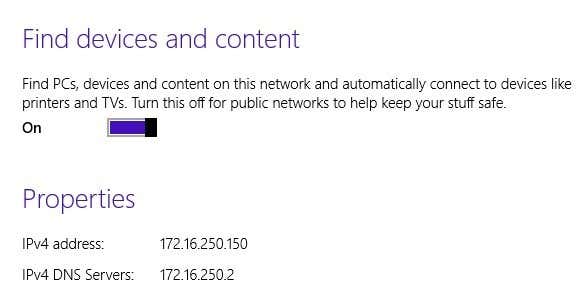
Now all you have to do is turn on the Observe devices and content selection. It'south automatically turned off for public networks, so when y'all turn it on, it changes the network to a private network.
Windows eight
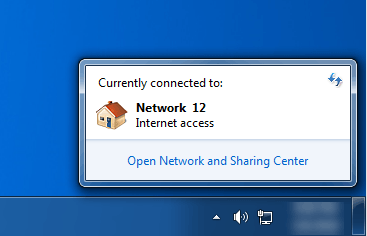
For Windows viii, follow the following procedure. Offset, right-click on the network icon in the Windows 8 arrangement tray and click on Open Network and Sharing Center.

Here y'all volition encounter the network you are connected to and what blazon of network Windows 8 has identified it as.
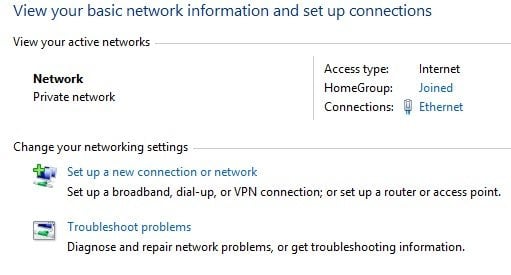
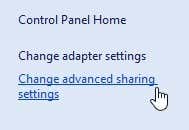
Every bit you can see above, my network is considered a Private network, which is correct since I'm at home and connected via Ethernet. If this is incorrect, there are a couple of things yous can practice. First, yous tin click on Change advanced sharing settings in the left-manus pane.
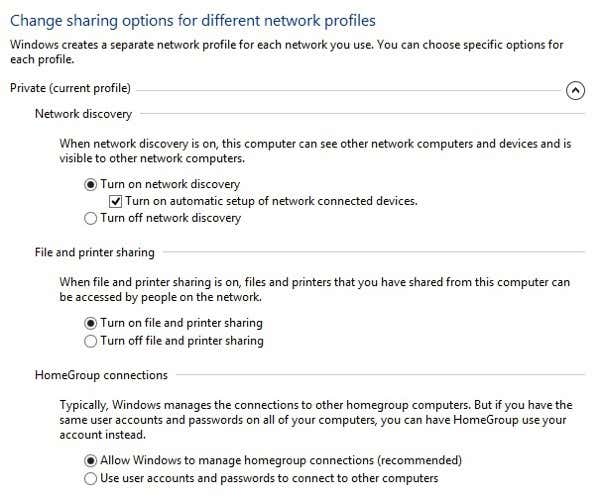
Click on Individual and so brand certain y'all have these options enabled:
– Plough on network discovery
– Turn on file and printer sharing
– Allow Windows to manage homegroup connections
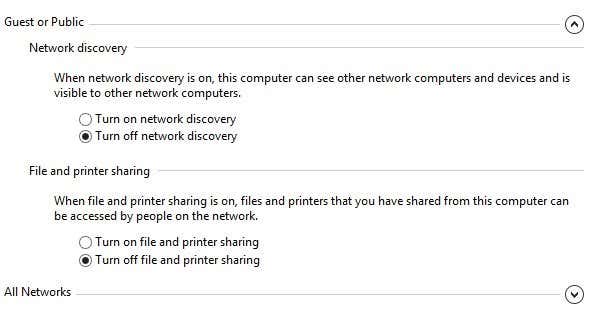
So collapse Private and aggrandize Guest or Public and make certain you have these options set:
– Turn off network discovery
– Plow off file and printer sharing
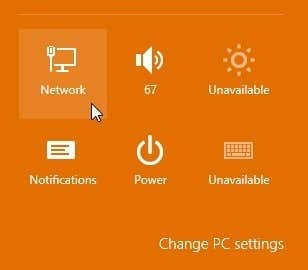
Once you accept washed this, you lot so need to go to the Windows 8 desktop and open the Charms bar. Click on Settings and then click on the Network icon.
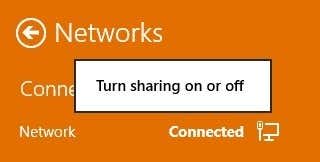
You'll encounter Network and then Continued. Get ahead and right-click on that and choose Plow sharing on or off.
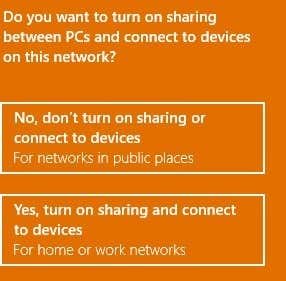
Now cull Yes if you desire your network to be treated like a private network and No if you want information technology to be treated like a public network. Note that the label Private or Public may remain the same in Network and Sharing Center, simply once you lot cull the sharing settings manually, the network will have the appropriate settings applied.
Windows 7
In Windows 7, the process is a bit different. You even so have to click on the network icon in your taskbar, but this time click on the Open up Network & Sharing Middle link.
Here, you will run across an overview of your network connexion. Under View your active networks, you'll see the proper name of the Ethernet or WiFi network and information technology should have a link underneath called Habitation network, Piece of work network or Public network.
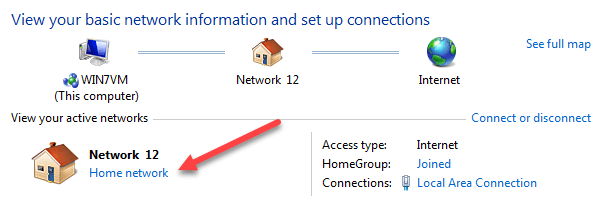
Click on that link and yous'll be able to change between the three different network types.
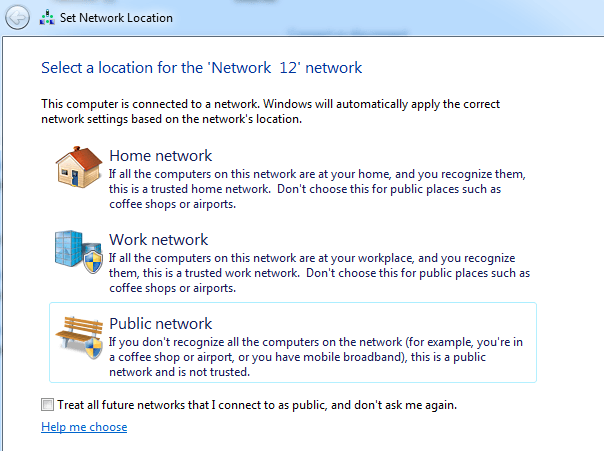
There is also an choice in Windows 7 to treat all future networks as public networks automatically, though I don't think nearly people would observe that useful.
Manually Force a Network Location
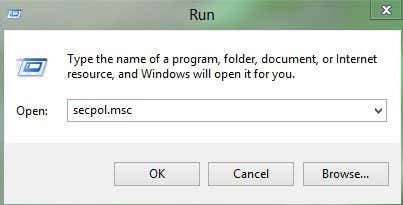
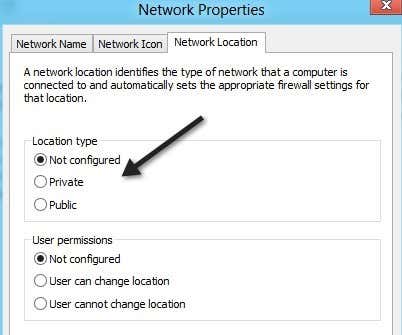
As a terminal resort, if you lot can't change the network location using the methods above, yous tin manually change the network location using a tool called secpol.msc. This volition non work on the Domicile, Student or Starter editions of Windows. In Windows, printing the Windows Key + R, which volition bring up the Run dialog box. Type in secpol.msc into the run dialog box.
Then click on Network List Director Policies at the left and on the right-hand side you lot should run into a couple of items with descriptions and so something chosen Network, which is the current network yous are connected to. Information technology may likewise be called something else, only it doesn't accept a clarification. If y'all are connected to a WiFi network, it will be the proper name of your WiFi network.
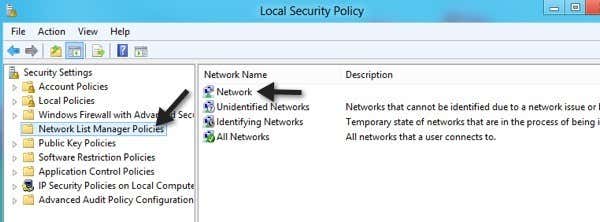
Double-click on it and click on the Network Location tab. Here you can manually alter the network location from Private to Public and vice versa.
That's almost it! Not the easiest thing in the world, but it's Microsoft! If you are having problems with changing network locations in Windows, post a comment hither and we'll help. Enjoy!
Do non share my Personal Information.
Source: https://www.online-tech-tips.com/windows-10/change-from-public-to-private-network-in-windows-7-8-10/
Posted by: martinproming.blogspot.com
0 Response to "How To Change From Wifi To Ethernet Windows 8"
Post a Comment